Sunday, September 6, 2015

Pressed Flower Bookmarks DIY

This spring inspired bookmark is a beautiful way to brighten up any book. The dried out, pressed flower sets a vintage and old time feel. This craft screams sassy but at the same time classy!
What you will need:

-Heavy objects (Textbooks work best)

- Flowers (Most flowers work for this project. Try to stay away from tulips and moisture-rich flowers. It will take forever to dry and will leave them moldy.)

-Packaging tape or laminate

-Colorful cardstock

-Double-sided tape


Do this a week in advance...
Go around you garden on a dry day and pick the flowers you want to press. Lay them out on waxed paper, cover with another sheet of waxed paper and place in the middle of a large textbook. The more textbooks and heavy objects, the better. After a week is up, take the flowers off very carefully and start your craft.


Step 1- Cut out the size you want your bookmark to be. I prefer 4 by 14 centimeters. You can do whatever size you want. I like to layer my cardstock and layer it with a print paper. It depends on the color of your flower. Just go with what speaks to you. :)


Step 2- After you finish assembling the base of your bookmark with double-sided tape, apply double-sided tape to the areas you want your flowers to be on the bookmark. Directly applying tape will make your flowers break.


Step 3- Laminate your bookmarks with a laminator and you are done! You have successfully created your bookmarks. If you don't have a laminator on hand, place clear packing tape over your bookmark on both sides for that protection against spills and tears.


Step 4- Enjoy your beautiful bookmarks! :)

 
Please watch this video to watch the bookmark made step by step!


Saturday, August 29, 2015

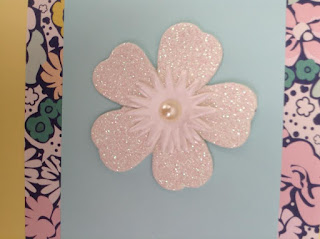
Make Beautiful Handmade Cards

Welcome to Stephanie's Crafts. This week, you will learn how to make beautiful handmade cards.  This is perfect for multiple occasions, or perfect to sell.

Creating... Female multi-occasion card-

What you will need:
-  cards and envelopes package
-scissors/cutting board
- double sided tape
- embellishment stickers
- print and solid color craft paper
-pencil

Step 1- First, you will take your blank card and fold it in half, along the creased line. You can use many different colors, personally, I prefer white. Make sure the crease is sharp, just like your card will be!


Step 2- Now, choose a solid print color or 2 and match it with a print color. Your decision could be totally different from another persons. That is the beauty of card making, you can make it completely unique!


Step 3- Cut and layer your sheets of paper. You can do this any way you want. I prefer 1/2 an inch from each piece. It all depends on your vision for the card. Do this for all of your selected paper.


Step 4- Apply double sided tape to all of your sheets and peel it off. Remember, double sided tape is expensive, a little goes a long way!


Step 5- Choose a embellishment sticker to top off your designer card. Make sure it matches the color scheme.


Step 6- Enjoy your beautifully made card!


Please watch this video to get a step by step tutorial!